What should barndominium floor plan software do that a house program can't?
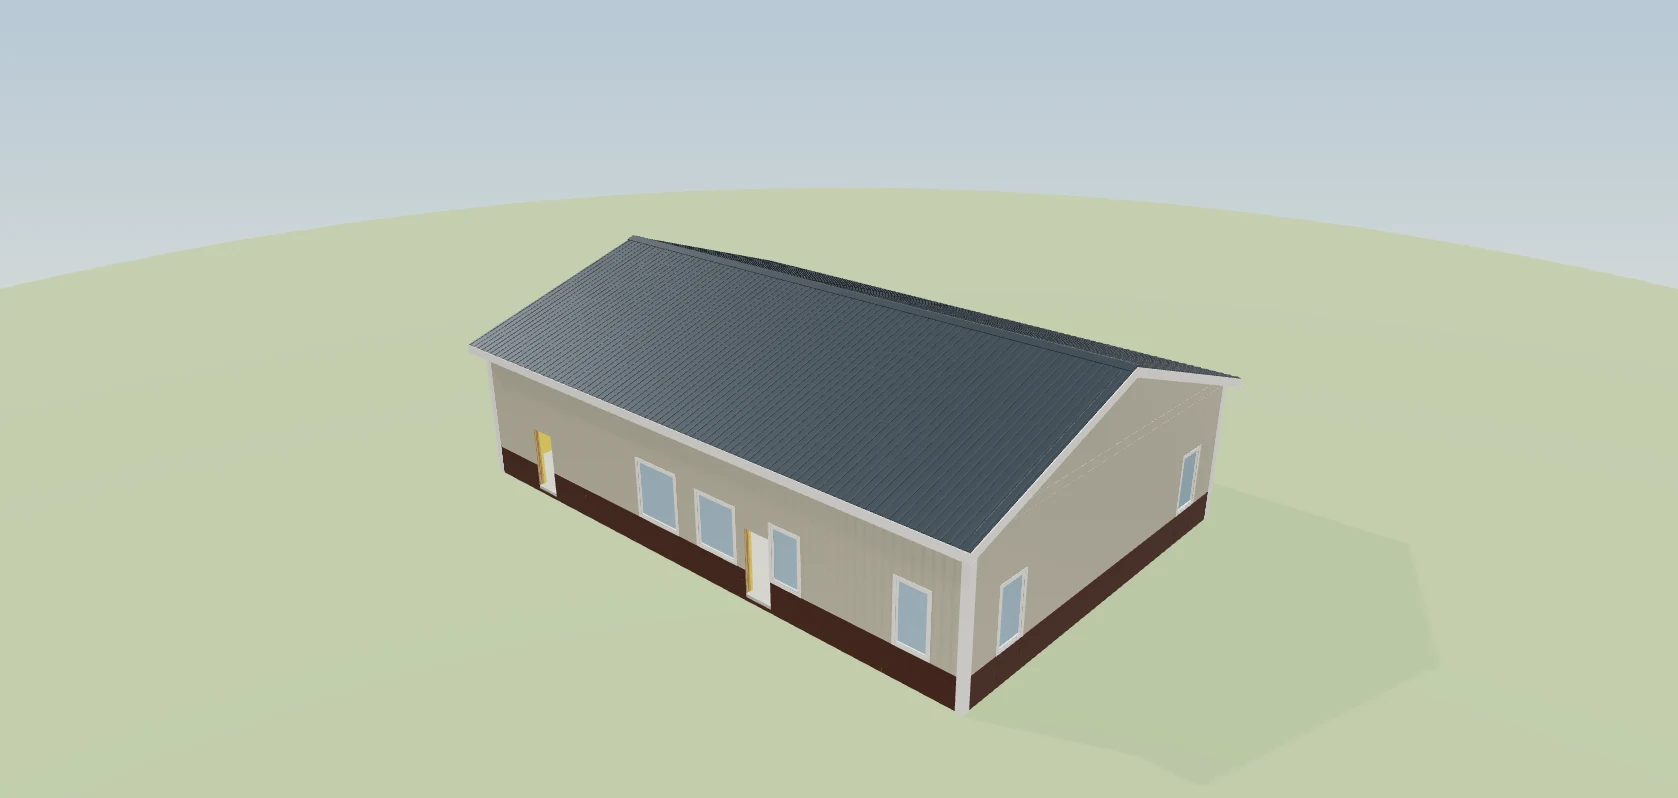
Barndominium floor plan software should draw the house on the shell you're pricing, so the rooms meet the real posts, windows and doors. Ours lifts the roof off your 3D building, starts from shouse layouts, checks the plan against IRC 2024, 2021 or 2018 as you draw, counts the interior and prints a true-scale permit set, one level or two.
- People value what they help make. In four studies, people rated things they built themselves close to experts' work, but only when they finished them. A customer who moves the kitchen on their own plan at your table values that plan, and the builder who drew it with them, more. Norton, Mochon & Ariely, 2012 ↗
- Living space changes the rules. A post-frame barndo's structure falls under IBC requirements, a wall less than 5 ft from the lot line needs a 1-hour rating, and the garage must be separated from the dwelling, so the house has to be drawn on the real shell. NFBA Frame Builder (Stauffer), 2025 ↗
- Moving a room is cheap on paper and costly once framed. Changing a line on a drawing before bidding costs little; moving a wall or window late in the build is expensive. BuildingAdvisor ↗
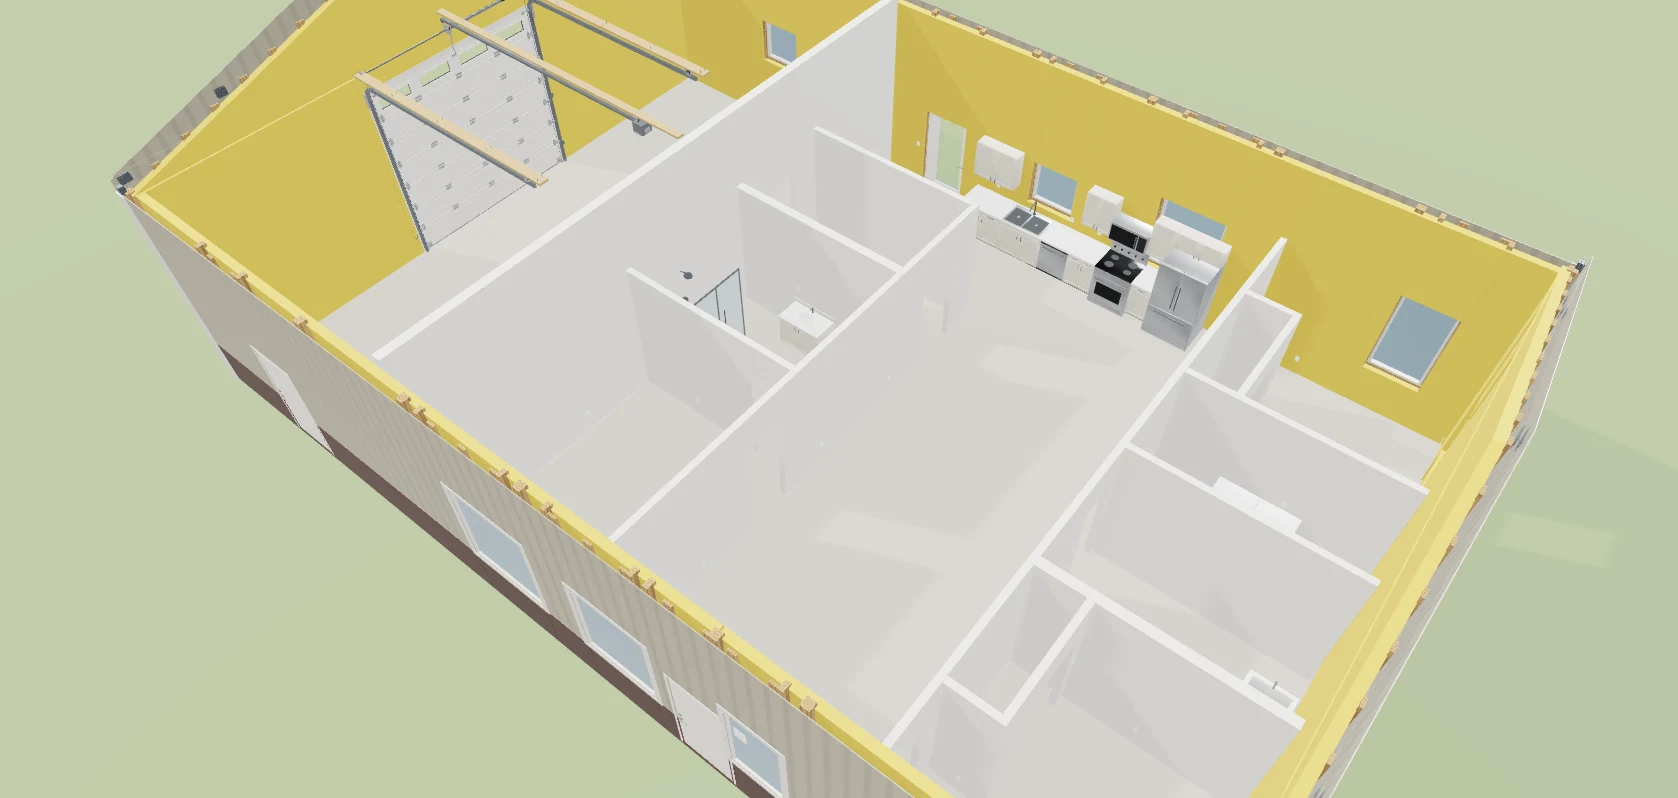
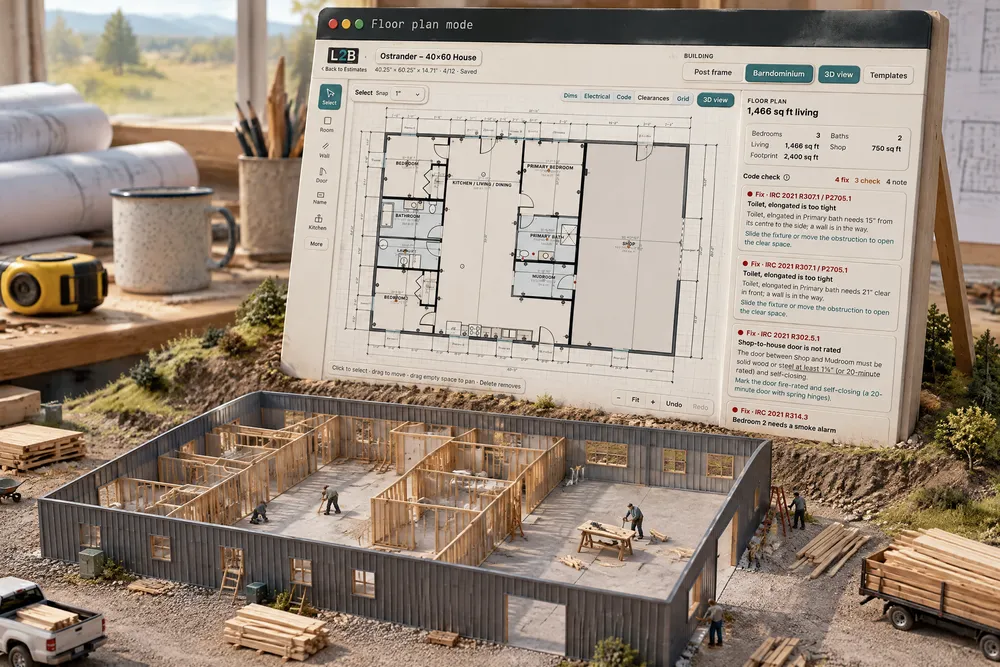
The Barndominium side of the 3D building designer. Switch the building to Barndominium — the framing switches to stud walls with it — press Floor plan, and the roof lifts off over the shell you already drew: the outside walls, windows and doors exactly where they'll be built. Start from five starter layouts or a template your team saved, then draw rooms, walls, doors, a kitchen run and the electrical — or right-click anywhere on the plan for what fits that spot. Add a second floor or a loft and draw each level over the one below. The plan is checked against IRC 2024, 2021 or 2018 as you go — each electrical item with the NEC section its IRC section comes from — the interior is counted line by line, the rooms stand up in 3D, and Print sheets makes a true-scale permit drawing set on 24×36, 12×18 or 11×17 paper — site, slab and plumbing, roof, elevations and more. Built exclusively for post-frame and barndominium builders, it already knows a shouse: the shop behind a separation wall, a slab floor, a 14′ eave over 9′ ceilings.
Also called: barndo floor plans · barndominium floor plan builder · shouse floor plan · barndominium designer · floor plan software for barndominiums · interior layout · barndo plan set · pole barn house plans
Start from a layout they can already see
Try itFive starters, each drawn as a real floor plan: a 30×40 cabin (2 bed / 1 bath), a 40×50 split plan (3 bed / 2 bath), a 40×60 shouse with a 20′ shop, a 40×60 open plan (4 bed / 2½ bath) and a 50×80 shouse with a 30′ shop. Use this copies one into the building — ⌘Z puts back what you had, and editing the building never changes the starter. Each one comes with escape windows in the bedrooms, a working kitchen, baths, laundry and the electrical already placed.
Every barndo quote starts from nothing, even though most customers want one of a handful of layouts.
People choose from what they can see. Put five drawn plans in front of a couple and they point at one and start moving rooms — that's a buyer, not a browser. For you, the first meeting starts with a plan on the table instead of a blank page.
Save the building you sell every month
Try itWhen a layout sells, Save this building as a template. It shows up under Your templates for everyone on the account, right next to the starters. Remove takes one off the list — and buildings already made from it are not touched.
The building a yard sells over and over gets redrawn from scratch, a little differently each time.
Your best seller should be one click away for every rep, not rebuilt from memory by whoever picks up the phone. A rep who starts from the building the owner already trusts quotes with confidence — and every quote of it comes out the same.
One building, two tabs: Post frame or Barndominium
Try itThe building has a Post frame / Barndominium switch in the header. Barndominium adds the Floor plan button and switches the framing to stud walls, the barndominium default; Post frame puts it back on posts in the ground. A wall system you picked by hand stays put, and the notice says so. Switch back to Post frame and the plan is hidden, not deleted — "Framing is now posts in the ground — the post-frame default. The floor plan is kept — switch back to Barndominium to see it." Nothing is lost on a mis-click.
A house program doesn't know post frame, and a post-frame configurator stops at the shell.
Nobody explores a tool that might eat an hour of work. Knowing the plan is kept makes a rep willing to try things in front of the customer. And a builder who does shops and barndos keeps one tool and one habit — the barndo extras stay out of the way on a plain shop.
Floor plan mode: the roof comes off
Try itPress Floor plan and the camera flies straight down, the roof disappears and a drafting sheet opens over the shell you already drew in the 3D designer — the outside walls and every window and door from the 3D model, sitting where they will be built. Tools down the left, most common first. On the right: 1,466 sq ft living, 750 sq ft shop, 2,400 sq ft footprint, with the code check under it.
Layouts drawn in a separate program don't know where the posts and windows are, so bedrooms land with no escape window and doors land on a post.
Drawing inside the real building means the rooms fit the posts and windows the crew will actually set — nobody translates between two drawings. And the rep, the owner and the customer are all looking at one plan, so the talk is about the house, not about which version is right.
Walk them through it in 3D
Back in the 3D view, the roof stays off and the rooms stand up like a dollhouse — interior walls, the kitchen run, the shower, the shop and its overhead door. Walk takes you through the rooms at eye height.
A flat drawing asks a customer to imagine the rooms. Most can't, so they wait.
A couple who sees their kitchen and bedrooms standing in their own building — in 3D, at their kitchen table — stops "thinking about it" and starts picking. It turns a steel building into their house. For you, that's a decision in the first meeting instead of the fourth.
Right-click anywhere on the plan
Try itRight-click a room, an inside wall, a door, a window, a cabinet, a fixture, a light or outlet, a note, a dimension or the empty floor — or hold a finger on it on a tablet — and the menu opens exactly where you clicked, headed with what you hit, offering only what fits it. On empty floor that is everything that can go there: a wall from the click, a room box, a door in the nearest wall, a window in the nearest outside wall, cabinets, bath fixtures, appliances, electrical, a note, a dimension, or stairs up. Every menu ends with Edit in panel and About this. A pick lands where you pointed, against the right wall and facing the room, and ⌘Z takes it back.
Hunting toolbars and panels for the right option while the customer waits is how a layout meeting loses its momentum.
What you clicked decides the menu, so the next step is one pick away — and it lands where you pointed, not in the middle of the room for you to drag into place.
Search every option, in the words you use
Try itType in the menu and it finds any option, two levels down included, and the trade words builders use: outlet finds the receptacles, pend the pendant, shaker the door style. ↑↓ and Enter pick one; ⌘K (Ctrl+K) opens the same search from the keyboard.
Nobody remembers which submenu holds a pendant light or a receptacle, so the option gets skipped or drawn by hand.
A builder types the word they already say on site and gets the thing, without learning where it is filed.
Drag a room. The walls draw themselves.
Try itPick Room box, choose what it is — Bedroom, bath, closet, office — and drag. The live size reads 12′-0″ × 13′-0″ as you go; let go and the walls are drawn and the room is named. A box drawn against another shares the wall, and an edge on the outside wall draws nothing, because the shell is already there.
Wall-by-wall drafting is slow and fiddly — which is why barndo layouts end up on graph paper.
People think in rooms, not walls. Drawing the way you talk — "a 12 by 13 bedroom in that corner" — lets an owner or a new rep lay out a house in minutes without learning drafting. Fast enough to do with the customer watching.
Type the length. Snap to a sixteenth.
Try itWith Wall, click to start and type the length — 12' 6 1/2", 150.5 or even 3.81m — then press Enter. Walls snap to ends, to other walls and to 45°, and the Snap step runs from 1/16″ to 1′. Pick the build first: a Plumbing wall is 2x6 and draws 6½″ thick, because a 3″ drain doesn't fit a 2x4.
A dragged line is "about" twelve and a half feet; on site, "about" becomes a cut that doesn't fit.
Builders measure in feet and inches, and they trust a number they typed more than a line they dragged. Getting exactly 12′ 6½″ removes the doubt — and a plan the crew can measure from is a plan they'll actually use.
Doors that know which way they swing
Try itClick a wall to drop a door — swing, pocket, bifold, barn slider, double or cased opening, in the sizes you order (2868, 3068…). Select one to Flip hinge or Flip swing, set its height, and mark it Fire-rated and Self-closing. The panel shows the clear width (33.5″), the rough opening (38.0″ × 82.5″) and the two rooms it joins — here, Shop · Mudroom.
A door from the shop into the house has to be rated and self-closing; a plain one gets caught at inspection.
A door swung the wrong way hits the vanity on move-in day — small, but it's what a homeowner remembers. Seeing the arc and the rough opening up front lets the framer get it right the first time.
A kitchen from the library, cabinet codes and all
Try itKitchen & bath opens the library: base, wall and tall cabinets, vanities, islands, plumbing fixtures and appliances. Pick one and click near a wall — it snaps to the wall and faces the room. Cabinets carry their order codes on the plan (SB36, B24, W3615), and the countertop is drawn over the base run.
Kitchens get sketched as a rectangle, then re-measured and re-ordered when the customer finally sees them.
The kitchen is where a barndo customer's heart is. A real cabinet run with real codes — not a box marked "kitchen" — tells them you've built this before. For the office, the same codes fill the cabinet schedule on the plan set.
Code-minimum electrical, in one click
Try itSelect a room and press Place code-minimum electrical. It adds the receptacles the code asks for along the walls (IRC E3901.2.1 [NEC 210.52(A)(1)]), a switched ceiling light, and the smoke alarm a bedroom needs. Bedroom 1 goes from four Fix items to nothing flagged. Place for the whole floor, at the top of the Electrical library, does every room on the floor in one step, plus what only a whole floor can place: a smoke alarm on every storey, the stair's light and a 3-way switch at each floor, and the receptacle a heating or cooling unit needs within 25′. Undo takes it all back. Select any device and Why it's here names the rule that put it there. Select a switch and tick the lights it turns on; the switch legs print on the electrical sheet. It's design intent for your electrician.
Receptacles and smoke alarms get left to a best guess, and a bedroom fails rough-in for a missing alarm.
Nobody enjoys spacing receptacles around a room. Letting the tool do the tedious part frees the builder to talk about where the TV and the island go — and the electrician starts from a layout instead of a blank wall.
A code check that flags problems while you draw
Try itThe right-hand panel checks the plan as you draw against IRC 2024, 2021 or 2018 (a new plan starts on 2024); electrical items cite the IRC section and the NEC section it came from, in the job's edition (Design › Code and site) — E3901.2.1 [NEC 2023 210.52(A)(1)] on IRC 2024, the NEC 2020 or 2017 numbers on IRC 2021 or 2018. GFCI, AFCI, foyers, porches, the receptacle beside a heating or cooling unit, an island by edition, a smoke alarm on every storey and the stair's switches are all on the list; where the code says what to place, the item's button places it. Each item is a Fix (fails as drawn), a Check (probably fails, or depends on something the plan can't see) or a Note, with the section number, a one-line fix and a marker on the plan — among them the attic access an attic 30″ tall over 30 sq ft needs (R807.1) and an attached garage's ceiling: ⅝″ Type X under rooms above, ½″ gypsum under the house's attic (R302.6). The numbers follow the edition: the smoke-alarm rule is R314.3 on IRC 2021 and R310.3 on IRC 2024. On an Oklahoma job on IRC 2024, a garage refrigerator's receptacle needs no GFCI (OAC 748:20-6-44), and the check says so with a Note. It's a builder's checklist with section numbers; your county's plan review still decides — and once it has, an admin, sales manager or project manager can Override… an item from its ⋯ with a typed reason, the same dialog and log as the building's Issues: it reads as a Note with who and when, its fix kept as a suggestion, and the sheets print it. The shell gets its own buildability check for what won't frame.
Code problems turn up at the rough-in inspection, after the walls are framed.
Finding a missing smoke alarm on a screen feels like being careful; finding it at inspection feels like getting caught. The list lets a builder walk into the permit office confident — and saves the tear-out and the second trip.
Clear floor at every fixture, checked
Try itTurn on Clearances and every fixture shows the clear floor it needs as a dashed zone. Slide a toilet too close to the vanity wall and the check says exactly why: it needs 15″ from its centre to the side and 21″ clear in front.
On a slab, a toilet roughed in too close to a wall can't be moved once the concrete is poured.
A tight bathroom is a complaint a homeowner lives with every single day. Seeing the zone makes the fix obvious — slide the fixture — before anyone sets a flange. For the builder, it's one less callback.
Show only what the reader needs
Try itFive switches along the top of the drawing: Dims, Electrical, Code, Clearances and Grid. Turn electrical off to talk layout with the customer; turn dims and code back on to check it yourself.
A plan with every symbol on it is unreadable to a customer and slow to check for a builder.
Too much on a drawing hides what matters. A customer reading a clean plan understands it; a builder checking dimensions wants nothing else on the page. One plan, shown the way each person needs it, keeps the meeting on decisions.
Measure anything, and it stays on the plan
Try itDimension measures between any two points — snapped to wall ends and wall faces — and the line stays on the plan. Here it checks the primary bedroom corner to corner: 18′-1 7/8″. Every outside wall already carries its dimension strings: the overall length, then the window and door positions. Lengths print to 1/16″.
A plan missing the one measurement the crew needs gets a tape measure and a guess.
A builder who can check a number on the spot doesn't have to take the drawing's word for it — and corner to corner is how a framer checks square. Numbers the crew can verify are numbers they build to.
A second floor or a loft, drawn over the first
Try it+ Add level adds a Second floor or a Loft, and tabs over the plan pick the level you are drawing. The level below shows as a dashed outline, so walls go over walls; the stair shows UP below and DN with its hole above; a loft's open edge is marked. Heights shows the stack top down — the eave, each floor's ceiling, each floor system, the top of the slab — and picking 8′, 9′ or 10′ for a ceiling moves the walls in the same step. Each level prints as its own floor-plan sheet. More on two-story barndominiums.
Upstairs rooms drawn on a separate sheet never quite line up with the walls and the stair below them.
Drawing each storey over the one beneath it keeps the bearing walls stacked and the stair where it lands, before anyone frames it.
The floor under it, priced
Try itWith an upper level on screen, the Floor system section sets what carries it: open-web floor trusses, I-joists or 2x joists, the depth, the spacing, the subfloor, Glued and fastened, and the stair — says how the floor ties to the wall (on the stud walls' top plate, a ledger on the studs, or a ledger bolted to the posts) — and shows the floor's materials and its labor with the arithmetic beside it. A span past what the joists carry lands on a beam and columns for an engineer to size — with the built-up girder IRC Table R602.7(2) allows named on the beam's line up to a 36′ width — and a second floor in a post-frame shell is flagged engineer required. The floor prices start as placeholders you replace with your supplier's.
Without the floor system, a loft or a second floor is an allowance — and the beam, the stair opening and the subfloor glue are nowhere on the quote.
The floor on the estimate is the floor in the drawing, with the engineer and supplier notes attached — the builder sees what still has to be confirmed before the price goes out.
The interior takeoff, line by line
Try itTakeoff counts the inside of the building from what you drew — framing, insulation, drywall, doors & trim, flooring, tile, cabinets & tops, paint, electrical, plumbing and appliances: 134 lines on the Ostrander plan, from 162 precut 2x4 studs for the interior walls to 54 twelve-foot sheets of ½″ drywall. Every line says how it was counted — and on a stud-wall shell the outside walls are framed once, by the shell, not again by the plan — and Download CSV hands the list to your supplier or spreadsheet. The same window shows the Priced interior at your own assembly prices; Add interior to estimate on the estimate puts it on, and nothing is added by itself — priced interior assemblies has the whole of it. The shell has its own material takeoff.
Interior materials get counted by hand from a printed plan, usually the night before the order.
A count that shows its working gets trusted; a number with no explanation gets counted again. When the drywall line says how it was figured, the office checks it in a minute instead of redoing it — and nothing is retyped off a drawing.
The interior, priced at your own numbers
Try itOn the estimate, Interior from the floor plan prices what you drew at your own assembly prices — drywall by the square foot, plumbing by the bath, cabinets by the foot of cabinet placed — each line saying how it was counted, with its materials and labor shown. Styles picked on the plan — interior doors, faucets and lights, cabinet doors and countertops, tiled showers — price as upgrades over builder grade. Add interior to estimate puts it on as one group of lines tagged with their trades. How each assembly and option is priced is on priced interior assemblies.
The plan is drawn, and the interior still gets priced in a spreadsheet off a room count somebody typed.
The finish-out is half a barndo quote, and the half builders dread pricing. When the plan's own counts meet the builder's own prices, the interior number exists the moment the customer agrees the layout — not three days later.
A plan set the crew can measure from
Try itPrint sheets makes a permit drawing set with a title block on every sheet, on Full size 24×36 (where a new set starts), Half size 12×18 or Tabloid 11×17 — one select in the toolbar. The title block and border grow with the paper and every drawing re-picks its scale: the 40×60's floor plan prints at ⅛″ = 1′-0″ on 11×17 and ¼″ = 1′-0″ on 24×36, and the half-size set labels the scale that paper actually measures. A0 cover and sheet index, A1 site plan, A2 floor plan — one page per level on a two-story house — A3 slab and plumbing penetrations, A4 roof plan, A5 exterior elevations, A6 interior elevations, A7 schedules, A8 notes and the code check, E1 electrical with switch legs and T1 the takeoff. Take a sheet out and the rest keep their numbers. The foundation notes follow the wall system — on this stud-wall shouse the cover reads Stud walls on a thickened-edge slab. Every scaled view carries a bar scale, so a tape on the paper reads a real measurement at any print size. Every sheet says what it is: design intent, not an engineered or sealed drawing. The whole set is on the permit drawing set.
Crews and subs get a screenshot or a sketch and measure off it anyway.
A crew trusts paper with a title block and a scale bar; a phone photo of a sketch gets second-guessed. Handing over a real plan set makes a small builder look like the professional outfit they are — and the framer builds what was sold.
A site plan drawn to the lot, with the setbacks checked
Try itSheet set details takes the lot, its setbacks and where the building sits, and the A1 site plan draws it — the distance from the wall to every lot line, and a setback table that says OK or CHECK. Put the 40×60 5′ from the left line on a lot with 15′ side setbacks and the distance turns red. For a lot that isn't square, Enter property lines from the survey — bearings as the plat reads them, turns or azimuths — and the closure is checked as you type, with a one-click fix for a line entered backwards. Enter the angle between plan north and true north and the site plan is drawn true-north-up with true bearings on the lot lines, while every construction sheet stays square to the building with an arrow showing both. The rest of the permit sheets are on the permit drawing set.
The building gets drawn too close to the lot line, and the county finds it before the builder does.
A setback problem found at the kitchen table costs a minute; found at the permit counter it costs a week. The builder sees the red distance while moving the building is still a number in a box — and the customer never hears about it.
- 1Switch the building to Barndominium and press Floor plan — the roof comes off and the camera looks straight down
- 2Start from a starter (30×40 cabin up to a 50×80 shouse with a 30′ shop) or your own saved template — ⌘Z puts back what you had
- 3Drag a Room box and its walls draw themselves; two boxes side by side share one wall
- 4Or draw wall by wall and type the length — 12′ 6½″ — snapping anywhere from 1/16″ to 1′
- 5Type a length and an angle for the next wall — 12'6 @ 30 — and press Enter: 0° points right and angles turn counter-clockwise
- 6Shift-click adds a wall, door or item to the selection; Shift-drag draws a box — left to right picks what is inside it, right to left what it touches. Drag any selected item to move them all; Copy, Duplicate, Turn 90° and Delete sit on the selection bar, and ⌘C ⌘V ⌘D ⌘A do the same
- 7A dimension drawn on a wall follows the wall when it moves; on an upper floor, Align with the wall below moves walls onto the walls they stand over
- 8Trace a plan… puts a picture of a plan under a floor: click the two ends of a length you know, type it and press Set the scale; then Line it up (a point on the picture onto the same point on your plan) and Square it if the picture is crooked; Fade, Show it and Lock it, which keeps its scale and place, are in the plan panel. A PDF works too: pick its page and it is drawn sharp enough to read the plan's dimensions at plan zoom
- 9Right-click a room, a wall, a door, a window, an item, a note or the empty floor for what fits it — on empty floor that is a wall, a room box, a door, a window, cabinets, fixtures, appliances, furniture, electrical, a note, a dimension or stairs — the menu opens where you clicked, and its search finds every option
- 10Click a wall to drop a door, then flip the hinge or the swing and mark it fire-rated
- 11Right-click an inside wall — or select it — for Braced wall panel: when the building needs a braced wall line, the wall that can be it says so, and on the slab a braced panel is bolted down like an outside wall
- 12Place cabinets, fixtures and appliances from the kitchen & bath library — they snap to the wall and face the room
- 13The Library has Kitchen & bath, Electrical and Furniture tabs: Furniture places true-size beds, sofas, a sectional, dining sets, a desk, a dresser and a 5′-10″ person, none of it ever priced
- 14Select a room and press Place code-minimum electrical for its receptacles, switched light and smoke alarm — or open Electrical and press Place for the whole floor for every room at once
- 15The Electrical library's Circuits tab puts the devices on circuits by rule, with the Panel schedule and, when you turn it on, a suggested service size
- 16+ Add level for a second floor or a loft; its Floor system section prices what carries it
- 17An attic access goes in the first time the plan needs one, in a hall or another easy-to-reach room; an attached garage's ceiling separation shows on the garage with Finish the ceiling; a room's Ceiling shape — Flat or Vaulted (scissor trusses) — sets the building's trusses
- 18The code check flags issues with the section number as you draw; Takeoff counts the interior; Print sheets makes the plan set
- 19Clearance standard in the plan settings holds your own clearances where they are stricter than the code — an 18″ toilet: inside the code but short of yours is a Check, and your number replaces NKBA's dining halo
- 20The rooms, interior walls, doors, cabinets, fixtures and electrical also read as rows on the builder's Checklist, with the plan's code checks against them
- 21Floor plans live inside the 3D building designer, which is switched on per account
A barndominium is two jobs under one roof: a post-frame shell and a house. Most barndo builders can lay out the shell quickly. The house is where it slows down — a layout sketched on graph paper or drawn in a separate program, redrawn every time the customer moves the kitchen, and never checked against where the posts and windows actually are. That is how a bedroom gets framed with no escape window: the window was on one drawing and the bedroom was on the other. So the plan is drawn on the shell itself. The windows placed in 3D are in the plan's outside walls; the shop's separation wall is a real wall type with Type X on the shop side; the code check, the takeoff and the plan set all read the same drawing. Move the kitchen and the count, the sheets and the 3D view follow. And because the whole platform serves post-frame and barndominium builders exclusively, the plan starts where their buildings start — a shouse, a slab, the wall system they actually frame — instead of asking them to bend a house program around a barn.
- Interior layouts drawn somewhere other than the building being sold
- Code problems found at inspection instead of on the drawing
- Interior materials counted by hand from a printed plan
- Barndo quotes that start from nothing every time
- Customers who can't picture the rooms and keep "thinking about it"
- Crews and subs building from sketches with no scale
- Upper floors and lofts priced as a guess
- Options buried in toolbars instead of on the thing being changed