What pole barn permit drawings does the county need?
Pole barn permit drawings usually mean a site plan with setbacks, floor and slab plans, a roof plan and elevations; some counties also want engineer-sealed structural sheets. Ours prints that set from the one model the customer approved, every sheet title-blocked at true scale on 24×36, 12×18 or 11×17, and marked as design intent for review, not a sealed design.
- There is no national permit set. Every jurisdiction has its own setback, code-year, snow and wind rules, and the Pole Barn Guru's advice is to get those answers in writing before design. Hansen Pole Buildings, 2020 ↗
- The plans reviewer only knows what is on the sheet. Better-informed people struggle to see a problem the way less-informed people do, so a builder who knows the building leaves out the dimension an inspector needs. A full set drawn from the model puts it on paper. Camerer, Loewenstein & Weber, 1989 ↗
- A permit is not a setback check. A permitted 1,900 sq ft pole barn in Rush, NY was stopped after framing at 50 ft from the road where 110 ft was required, about $25K to build plus about $35K to move; the town inspector had misread the survey. Hansen Pole Buildings, 2022 ↗
- Many residential building departments require engineer-sealed plans, and having them ready speeds the permit. Hansen Pole Buildings, 2016 ↗
The barndominium floor plan grows into the sheets a permit office asks for, all drawn from the same model: A0 cover and sheet index, A1 site plan, A2 floor plan, A3 slab and plumbing penetration plan, A4 roof plan, A5 exterior elevations, A6 interior elevations, then schedules, general notes — with the truss design loads, any finding someone overrode, who and why, the window and door flashing order, and Oklahoma's footing rule unless the job names another state — the E1 electrical plan — each device's circuit number, a device legend and the panel schedule, a 2-pole breaker on one line as 1/3 — the structural sheets and the takeoff. Pick the paper — 24×36 full size, where a new set starts, 12×18 half size or 11×17 — and the title block and border grow with it while every plan takes the largest standard scale that fits, with a bar scale on every view. Every sheet carries the builder's name and logo, the job address, owner, sheet title, scale, date and revision. You add what the model can't know — the lot, the setbacks, where the building sits and which way true north is — and your own dimensions and notes, and they save with the plan. The site plan can be drawn to true north, from the lot's bearings and distances off the survey when it isn't a rectangle, while every construction sheet stays square at plan north. Built exclusively for post-frame and barndominium builders, so the slab sheet locates every drain off the gridlines of the building's own bays. Every sheet says what it is: design intent for permit review, to be verified locally — not a survey, and not an engineered or sealed design.
Also called: permit drawings · permit set · barndominium permit plans · site plan · slab plan · plumbing penetration plan · roof plan · exterior elevations · interior elevations · sheet index · title block · plan set for permit · 24x36 plans · full size plans · half size plans · 12x18 plans · 11x17 plans · sheet size
One press, the whole set
From the floor plan, Print sheets opens the set for Ridgeline 40×60 Shouse: A0 the cover, with the building's views, the sheet index and the project data — 40′-3″ × 60′-3″ outside of girts, a 4:12 gable, 1,466 sq ft living and a 750 sq ft shop, three bedrooms, two baths, a 4″ slab — and the code path: Engineer required — trusses, headers and beams by sealed drawings, because a 40′ building is wider than the IRC truss and header tables. Then A1 to A8 — site, floor, slab, roof, elevations, interior elevations, schedules, general notes — the structural S sheets, E1 electrical and the T1 and T2 takeoff sheets, on 24×36, where a new set starts. The cover says plainly: for permit review — verify locally; not a survey, not an engineered or sealed design.
Every barndominium needs a permit set, and every set means a drafter's bill or a builder's weekend.
A builder walking into the permit office with a bound set looks like the professional outfit he is. For the business, it is a drafter's invoice that doesn't get paid on every barndo — and a set that can't disagree with itself, because every sheet came from one building.
24×36, 12×18 or 11×17 — the same set on any of them
Try itOne select in the toolbar, or Sheet set details → Paper: Full size 24×36, Half size 12×18 or Tabloid 11×17. The title block and border grow with the paper — nothing is resized by hand — and every plan re-picks its scale for the room it has: on the 40×60 the floor plan goes from ⅛″ on 11×17 to ¼″ = 1′-0″ on 24×36, and the site plan from 1″ = 40′ to 1″ = 20′. Every view keeps a bar scale, the PDF comes out at that paper size, and a view that won't fit its sheet is named before anything prints. A set saved before the sizes existed keeps 11×17 until someone switches it.
The set is drawn for one paper size, and the job needs it full size and half size.
The same set gets printed at more than one size. Picking the paper — instead of redrawing a title block and re-scaling every view for it — keeps a size change to one click, and the scales right.
Half size: the scale on the sheet is the scale on the paper
Half size 12×18 is the 24×36 set printed at 50%, and every scale is relabelled to what the paper in hand measures: the floor plan's ¼″ = 1′-0″ prints and reads ⅛″ = 1′-0″. A HALF SIZE — 12×18 note in the title block names the 24×36 scale, so the two sets compare sheet for sheet, and the bar scale on every view reads true at any print size.
A half-size print that still says ¼″ = 1′-0″ measures ⅛″ on the paper.
A scale rule laid on a half-size sheet that still says ¼″ reads every length at half its size. Labelling the scale the paper actually carries means whoever holds the sheet reads the right number.
A site plan drawn to your lot and setbacks
A1 draws the building on its lot from numbers you already have off the plat: a 160′ × 260′ lot, setbacks 30′ front, 20′ rear, 15′ each side, the front endwall facing County Road 340, the building 60′ back from the front line and 40′ in from the left. It draws the setback lines, the roof edge dashed, the driveway in from the street, the north arrow — and the distance from the wall to every lot line. The Setbacks table lists required against provided, OK on every side; the site data gives lot area, footprint, coverage and impervious area. A rectangle is the quick start; a lot that isn't one goes in from the survey.
The site plan gets drawn by hand on a copy of the plat, and the distances on it are whatever the builder wrote.
The county asks for a site plan before it reads anything else, and most builders sketch one on a copy of the plat. Drawing it from the building the customer bought — with the distances measured, not guessed — means the first sheet the reviewer reads is one they can check.
Inside a setback? It turns red before the county sees it
Try itSheet set details → Site & north takes the lot, the four setbacks, which wall faces the street and how far the building sits from the front and left lot lines, typed the way builders write them — 25, 25′, 25′6″ — or you drag the building into place on the site plan. Change From left lot line from 40′ to 5′ and the site plan redraws: the 5′-0″ distance turns red, and the setback table says CHECK on the left. Until the real lot is entered, the sheet prints a red placeholder lot warning.
A building drawn too close to the lot line is found at the permit counter, and the job waits for a redraw.
Finding a setback problem at the desk costs a minute; finding it at the permit counter costs a week — and the customer's confidence. The red distance tells the builder before the county does, while moving the building is still a number in a box.
True north on the site plan, plan north on every other sheet
Set how far plan north — the top of every construction sheet — sits from true north, and A1 is drawn with true north straight up: the 160 × 260 lot turned under it, each lot line labelled with its true bearing, FRONT S 23°15′00″ E 160.00′ along the road, and the site data saying Plan north is 23°15′ west of true north. The floor plan, slab, roof and electrical sheets stay square at plan north, and their north arrows carry a PN tick. A lot that isn't a rectangle goes in line by line — the site plan from the survey is the whole story.
Turn the site plan to true north by hand and every other sheet in the set ends up at the same odd angle.
The site plan has to read to true north, and the crew builds from sheets square to the building. One angle gives each sheet the orientation its reader needs, and the arrows say how the two relate.
Drains located off the gridlines, before the pour
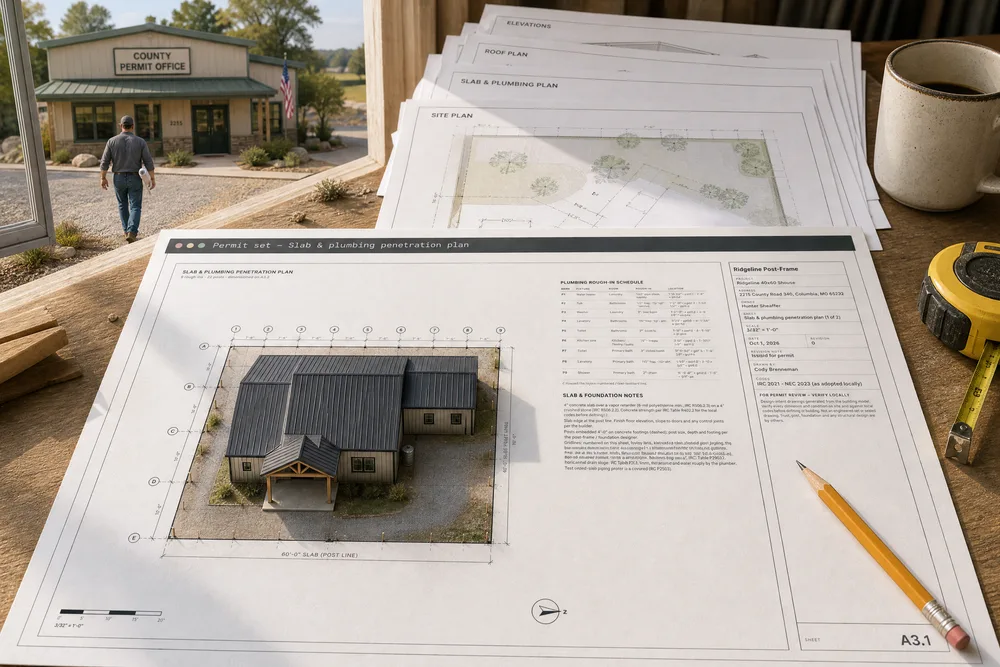
A3 is the slab and plumbing penetration plan: the slab, the building's gridlines with numbered bubbles on the bay lines and lettered bubbles across the endwall spacing — and every post and footing when the shell stands on posts — and a mark on every drain the fixtures need: P1 to P9 on the 40×60, from the laundry's water heater to the primary-bath shower. The plumbing rough-in schedule gives each one its fixture, room, typical rough-in size and where it sits off its nearest gridlines, and the set's notes say plainly that the plumber verifies every location, size and slope before the slab is poured.
The drains get located by eye the morning of the pour, and somebody rents a saw the week after.
Concrete cut after the pour is the most expensive line on a barndo. Locating each drain off the building's own gridlines gives the plumber a number to tape off — and the builder a sheet to point at when the toilet is in the wrong place.
Every drain dimensioned to a gridline
When the plan has drains, the slab sheet gets a second page: the drains' part of the building, enlarged — at ½″ = 1′-0″ on 24×36 — each drain dimensioned to its nearest numbered and lettered gridlines at a scale the figures can be read at on site. The marks and sizes match the schedule on the first page.
At slab scale the drain dimensions are too small to read, so nobody reads them.
A dimension from a gridline is one a crew can measure in the dirt. At slab scale the figures are too small to read on a tailgate; enlarging just the wet walls keeps the whole slab on one sheet and the drains readable on the next.
The roof plan, projected from the model
A4 is drawn from the 3D building: the ridge, the eave and rake overhangs, a pitch arrow on every plane pointing down-slope, the walls dashed beneath, the overall roof and building dimensions, and roof notes — the roofing, the pitch, the overhangs, and that truss design and bracing are by the truss manufacturer. Lean-tos and porches carry their own arrows at their own pitch.
The roof plan gets drawn last, in a hurry, and the overhangs on it are from a different building.
The roof plan is the sheet nobody wants to draw, and the one most often wrong on a hand-drawn set. Projecting it from the model the customer approved means the pitch on the sheet is the pitch on the quote.
Four elevations that move when a window moves
A5 draws all four sides of the building from the model — front and back endwalls, both sidewalls — with eave, ridge and grade heights, the wainscot, and every door and window tagged as in the schedules. Move a window in the 3D builder and it moves on the elevation, because there is only one building. A long building runs to a second elevation sheet rather than shrinking past legibility.
The customer moved a window last week and the elevations still show it where it was.
Elevations redrawn every time the customer moves a window are elevations that end up wrong. Drawn from the model, they can't fall behind — and the customer sees the same house on the elevation that they saw in 3D.
Kitchen, bath and laundry walls at real heights
A6 draws each kitchen, bath and laundry wall with its cabinets, counters, appliances and fixtures at their real heights above the finished floor, numbered to the markers on the floor plan — on the 40×60, the kitchen run, both baths and the laundry, eight walls.
Kitchen and bath walls get explained on site with a tape and a pencil, a different way to each trade.
The cabinet installer, the plumber and the electrician all argue about the same wall. A drawing of it at real heights settles the outlet over the counter and the vanity height before anything is rough-framed.
Add the dimension the reviewer asks for
Dimension is one of four tools on the sheets page, with Select, Note and Site point: click two points, then where the line goes. It snaps to the drawing — gridline crossings, corners, posts — squares itself up when it is nearly level, and reads the true length on a sheet drawn to scale: two gridlines on the slab, 7′-6″. Double-click to type your own text instead. Select, drag, Delete and ⌘Z all work, and every dimension saves with the plan.
The reviewer wants one more dimension, and the plans go back to the drafter for a week.
The one dimension the inspector asks for is never the one on the sheet. Adding it in a minute — at the real scale, saved with the plan — beats a redraw and a second trip to the counter.
Notes that live on the drawing
Note: click what it points at, click where the text goes, type and press Enter — a leader note on the sheet, saved with the plan and printed with it. On the 40×60's site plan, "Existing well — 50′ from septic"; on the slab, a note on the primary-bath shower drain. Notes can be moved, edited with a double-click and deleted, on any sheet.
The instruction about the drain is in a text to the plumber, and the plumber on the day is somebody else.
Site instructions that live in a text message never reach the plumber. A note on the drawing beside the thing it is about is read by everyone who reads the sheet — the county, the crew and the subs.
Every sheet carries a title block
Down the right side of every sheet: the builder's name and logo, the project, the job-site address, the owner, the sheet title, the scale, the date, the revision and what changed, who drew it, and the review note — design-intent drawings, verify locally; not an engineered or sealed drawing. The sheet number is the largest thing in the block.
A sheet gets separated from the set and nobody can tell which job or which revision it belongs to.
Loose sheets without a job, a revision and a scale on them get mixed up at the office and at the counter. A title block on every page means each sheet stands on its own when it is pulled from the stack — and carries the builder's name while it does.
Take a sheet out; the numbers stay put
Try itSheets in the set switches any sheet but the cover in or out, and the index on the cover follows. The numbers never shift: take out T1 and the roof plan is still A4, so a reviewer's comment on "A4" means the roof plan after every revision. The title block's Revision and What changed fields travel with the set, and plan revisions keep the uploaded versions in order on the job.
Drop one sheet and every sheet number after it changes, and the reviewer's notes stop matching the plans.
Every county asks for a slightly different set, and a set that renumbers itself turns a reviewer's comments into a puzzle. Fixed numbers keep the conversation with the permit office simple.
- 1In the 3D builder, open Floor plan and press Print sheets — the whole set opens in its own tab, one sheet after another
- 2Pick the paper in the toolbar, or in Sheet set details → Paper: Full size 24×36, Half size 12×18 or Tabloid 11×17 — a new set starts on 24×36
- 3Sheet set details takes the job address, owner and revision, the lot and its setbacks, which wall faces the street and where the building sits — and which sheets go in
- 4Under Site & north, set how far plan north is from true north — drag the dial or type the angle — and the site plan is drawn to true north while every other sheet stays at plan north
- 5For a lot that isn't a rectangle, Enter property lines from the survey takes each line's bearing and distance off the plat, with the closure checked as you type
- 6Until the lot is entered, the site plan prints a red placeholder lot warning
- 7The site plan draws the lot, setbacks, building, roof edge, driveway and north arrow, the distance to every lot line, and a setback table that says OK or CHECK — drag the building on the sheet and the distances follow
- 8The slab plan marks every drain the fixtures need, located off the numbered and lettered gridlines, with a rough-in schedule; an enlarged sheet dimensions each drain to its nearest gridlines
- 9The roof plan and exterior elevations are projected from the 3D building; interior elevations show each kitchen, bath and laundry wall at real heights
- 10Dimension and Note add your own dimensions and leader notes on any sheet; they save with the plan
- 11Available on request, switched on per account: Add detail drops typical details drawn to scale — post-frame posts, girts, purlins, eaves and ridge vents, stud walls, porch and lean-to connections, flashing and trim — onto any sheet or onto S5 Typical details, which adds a page as it fills; move it, change its scale, and edit every callout, size and note. Each is labelled typical, not an engineered detail
- 12Site point places the road, meter, pole, well, septic tank, septic field and propane tank on A1; each run is measured to the nearest wall and rounded up, Site items lists them, and A1 prints a Utility runs table the estimate prices
- 13On a two-storey design the floor plan, slab and plumbing, interior elevations, schedules, notes and code check, electrical plan and both takeoff sheets print a page per storey wherever that floor has something to draw, titled with it (A2.1 Floor plan — Main floor, A2.2 Floor plan — Second floor)
- 14The structural sheets: S1 Foundation plan with every anchor bolt at its position, the footing schedule and the bolt count the takeoff buys; S2 Floor framing plan for each framed upper floor; S3 Roof framing plan with the truss schedule, saying engineer required past the IRC truss limits; S4 Sections & details — the building section, the wall section, stair profiles with their checks and numbered starter details. T2 draws each counted item where it was counted, with a legend and quantities, readable in black and white
- 15Every title block carries the project number, Checked by, a licence and seal box that prints empty unless you fill it in, the revision and What changed, and "Sheet x of y", and the Codes line prints the edition's NEC (IRC 2021 · NEC 2020); the cover adds a revision table. The project number, revision and What changed are in Sheet set details; Checked by and the seal box are under More title block fields
- 16On this sheet switches what one kind of sheet shows — A2: dimensions, room names, furniture, electrical symbols; E1: circuit numbers, legend, panel schedule; S1: bolt callouts, penetrations, gridlines — and Reset to preset puts it back
- 17Right-click any sheet for its options: Scale, its On this sheet switches, Open in plan (on that storey), Sheet set details…, Sheet size, take that sheet out of the set, and Download PDF or Print
- 18Print / Save as PDF at 100% (Actual size) prints one page per sheet on the paper picked, at scale — and names any view that won't fit its sheet before it prints
A barndominium permit needs more than a floor plan: a site plan with setbacks, a slab plan the plumber can rough in from, a roof plan, four elevations and the kitchen and bath walls. Most builders pay a drafter for that set on every job, or draw it themselves at night — and drawing the sheets separately is how the elevations end up showing a window the floor plan moved last week. Here every sheet is drawn from the one building the customer approved, so when the building changes, the whole set changes with it. And the drawings say plainly what they are: design intent for the permit office to review, with truss, post, foundation and any structural design by others.
- Permit sheets drawn separately and out of step with the floor plan
- Slab rough-ins located by guesswork before the pour
- A building placed inside a setback, found at the permit counter
- A site plan drawn square when the lot isn't
- One paper size when the job needs full size and half size
- Paying for a drafted permit set on every barndominium
- Loose sheets with no job, revision or scale on them